Table of Contents
ToggleA Daimatics, we know that installing WordPress can seem like a complex process for beginners. That's why we've put together this definitive guide that combines the best information available with our experience as web hosting and optimization experts.
This article covers different methods for installing WordPress, including using cPanel, Plesk and manual installation. We will also guide you through the pre-configuration of the environment and the resolution of the most common problems. At the end of the process, you will have your website running optimally and securely.
Why choose WordPress for your website?
WordPress is a free and open source content management system (CMS) that offers a great flexibility i ease of useIt is ideal for both beginners and advanced users.
Main advantages of WordPress:
- Free and open source: No hidden costs, adaptable to any project.
- SEO-friendly: Optimized to position yourself in search engines.
- Highly customizable: Thousands of themes and plugins to suit your needs.
- Compatible with different servers and platforms: Works with Apache, Nginx, Windows and macOS.
| Installation method | Ideal for... |
|---|---|
| Self-installer | Beginners who want to create a site quickly. |
| Softaculous | Users with cPanel, Plesk or other similar panels. |
| Manual installation | Experts who want more control and flexibility. |
| Local installation | Test websites in private environments before publishing them. |
Preliminary preparations for installation
Before you begin, make sure you have the following:
| Required item | Description |
|---|---|
| domain name | Your website address, such as www.elmeulloc.com. If you don't have one, you can register it with Daimatics. |
| Web Hosting | A service that supports panels like cPanel or Plesk, compatible with WordPress. |
| Access to server files | It allows you to upload and manage files required for WordPress. |
| Database MySQL | Where WordPress will store all the site data. It can be created from your hosting control panel. |
The following steps are valid whether you use cPanel com PleskWe adapt them to offer you a clear and easy-to-follow explanation.
1. Download WordPress
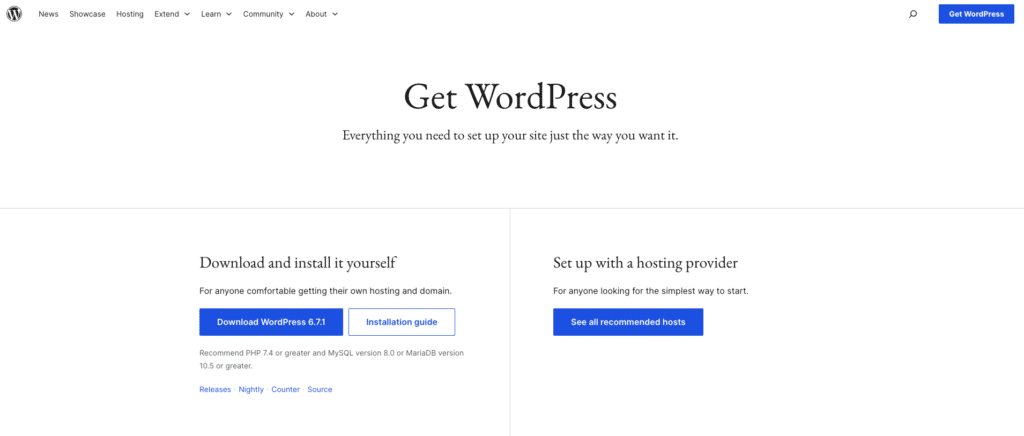
To get started, access the official website of WordPress.org to download the latest version of the CMS. If you prefer to use a localized version, you also have the option to download it in Catalan or Spanish:
- English version: go to WordPress.org to get the main and most up-to-date version of the CMS.
- Catalan version: Access to ca.wordpress.org to download WordPress with the administration interface and system messages translated into Catalan.
- Spanish version: visit es.wordpress.org to download WordPress completely translated into Spanish.
Important note
The main difference between these versions lies in the language files, which define the language of the administration interface and system messages. The operation and functionalities are exactly the same in all versions. If you plan to use multiple languages on your website, you can easily add plugins like Polylang or WPML to manage multilingual content.
2. Prepare the environment in the hosting panel
cPanel
When you access your cPanel control panel, identify these tools:
- File Manager: To upload the files.
- Database Assistant MySQL: To create the database.
Plesk
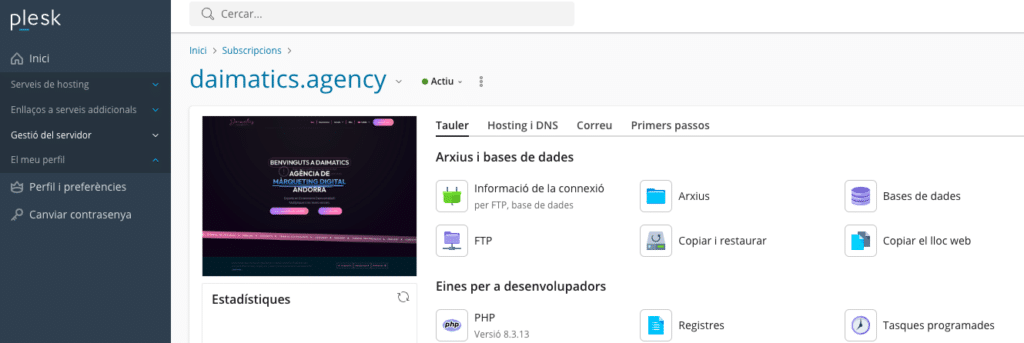
In Plesk, the essential logins are:
- File Manager: Upload and manage server files.
- Databases: Allows you to create and configure a database.
3. Upload the files
With cPanel
- Access to File Manager and open the folder
public_html. - Prem load and select the WordPress ZIP file you downloaded.
- When the upload is complete, right-click on the file and select extract to unzip it.
With Plesk
- Access to File Manager and remove default files a
httpdocs. - Download the WordPress ZIP file and unzip it.
Note: When you unzip WordPress, the files will be inside a folder called
wordpress. Move all files to the root of the directory (public_html or httpdocs). 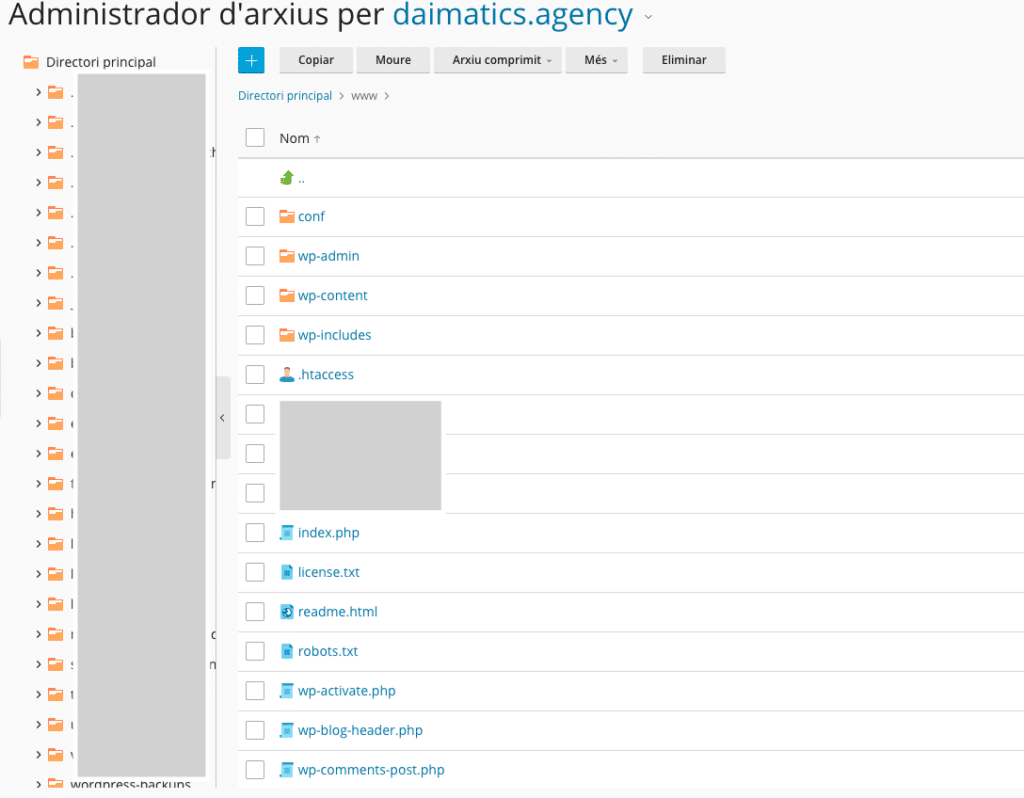
4. Create a database
With cPanel
- Access theDatabase Assistant MySQL.
- Define a name for the database. (Example:
user_baseData). - Create a user and a strong password to access the database.
- Assign full permissions to the user.
With Plesk
- go to Databases and select Add database.
- Enter the database name, username, and password.
- Generate the password automatically with the built-in tool if necessary.

5. Configure WordPress
- Access your domain from the browser (eg
https://elmeulloc.com).- If you have an SSL certificate, access directly with https.
- Rename the wp-config-sample file.php in wp-config.php.
Open it and edit the following lines with the database data:- Name of the database: The one you created in the previous step.
- Username and password: The ones you defined.
- Table prefix: You can leave
wp_or use a custom prefix to improve security.
- Click on Run the installation.
// ** Configuration of MySQL: you can get this information from your hosting provider ** // /** The database name for WordPress */ define( 'DB_NAME', 'database_name' ); /** Database username MySQL */ define( 'DB_USER', 'username' ); /** Database password MySQL */ define( 'DB_PASSWORD', 'password' ); /** Server name MySQL (usually localhost) */ define( 'DB_HOST', 'localhost' );
6. Finish the installation
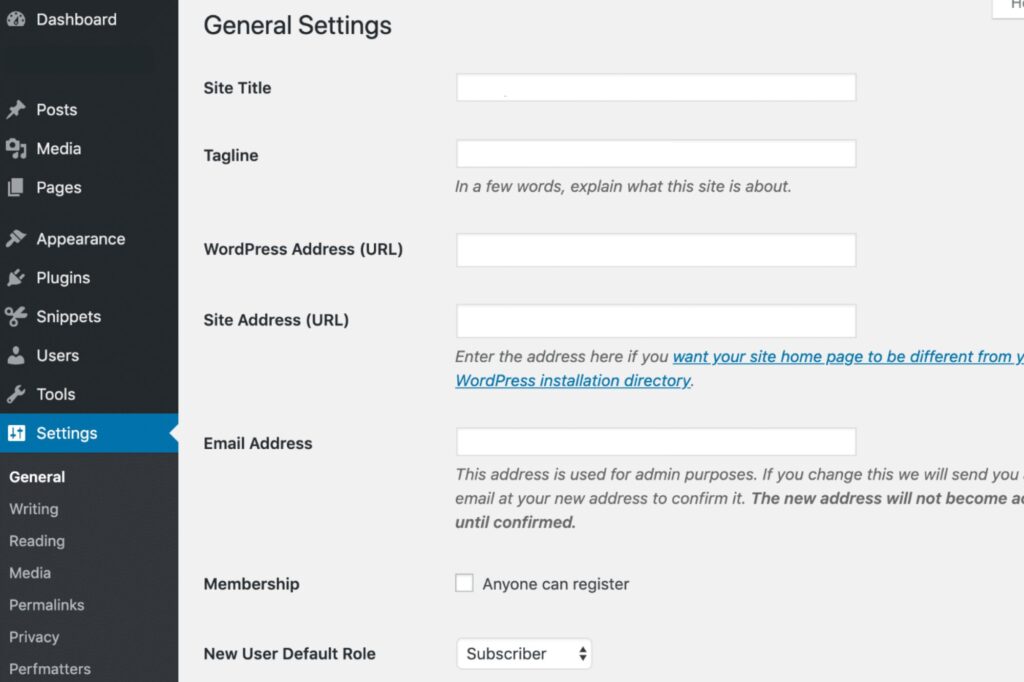
- Define the site title, the administrator username and the password.
- Recommendation: Avoid names like "admin" or "administrator".
- press Install WordPress.
Once completed, you will receive a direct link to your WordPress dashboard.
Common problems and solutions
| Common problem | cause | Solution |
|---|---|---|
| Directory listing instead of website | The server does not detect a file index.php. |
Upload a file index.php in the directory public_html or disable directory listing in the control panel. |
| "Database connection" error | Incorrect credentials in file wp-config.php. |
Check the database name, user, password, and host in the file wp-config.phpIf necessary, create a new database. |
| "Header already sent" error | Blank spaces or errors in the file wp-config.php. |
Make sure there are no spaces before the <?php nor after ?>. |
| Nonsense sentences on the screen | PHP not working properly or misconfigured. | Check that PHP is installed and activated on the server. Check the file settings php.ini. |
| Changes are not reflected | Browser or server cache. | Clear your browser cache (Ctrl+F5) and disable server caching if necessary. |
Why install WordPress with Daimatics?
to choose Daimatics as a hosting provider for your WordPress site offers you numerous advantages:
WordPress optimized hosting: All of our plans are designed to provide maximum performance, security, and speed for WordPress-based websites.
Ease of installation with cPanel and Plesk: Whether you prefer cPanel or Plesk, with Daimatics you will have tools like Softaculous and other automatic installers that simplify WordPress implementation in just a few clicks.
Additional tools for website management: In future articles, we will discuss other options we offer, such as Installatron or WordPress Toolkit, which facilitate the installation, management and optimization of your websites.
Personalized assistance: The team of experts from Daimatics is always available to resolve any questions or problems, helping you configure your WordPress quickly and efficiently.
Frequently asked questions about installing WordPress
WordPress needs a server with:
- PHP 7.4 or higher.
- MySQL 5.7 or MariaDB 10.3 or higher.
- HTTPS support for a secure connection.
- cPanel It is more popular and easy to use for beginners.
- Plesk offers more advanced tools like WordPress Toolkit, ideal for advanced users.
Note: A Daimatics, we mainly work with Plesk, because we believe it provides a more powerful and personalized experience for our customers. It is perfect for installing and managing WordPress, thanks to its integrated functionalities. If you use our services, you will enjoy an optimized and easy-to-manage environment.In future articles, we will explore in depth how to get the most out of Plesk and its advanced tools. 😊
If you are a beginner, the self-installer like Softaculous or Installatron is the best option. If you have technical knowledge or need to customize the structure, manual installation offers you more flexibility.
Yes, you can install it locally on your computer using programs like MAMP (Mac) or WAMP (Windows).
Yes, you can install the CMS version in the language you prefer (English, Catalan, Spanish, etc.). In addition, plugins such as Polylang or WPML allow you to manage multilingual sites.
